Soccer banners are more than just decorative pieces; they are powerful tools for expressing team spirit, rallying supporters, and creating a vibrant atmosphere during games. Custom soccer banners provide an opportunity to showcase your team’s identity, uniqueness, and passion. Whether you’re supporting a local soccer team, a school team, or a recreational league, creating a personalized soccer banner can be a rewarding and enjoyable experience. In this article, we will guide you through the step-by-step process of making custom soccer banners that will make your team stand out on and off the pitch.
How to Make Custom Soccer Banners
Step 1: Plan Your Design
Before you start creating your custom soccer banner, it’s essential to plan your design carefully. Consider the following elements:
Team Colors: Choose the primary and secondary colors that represent your team. Consistency with team colors will reinforce team identity.
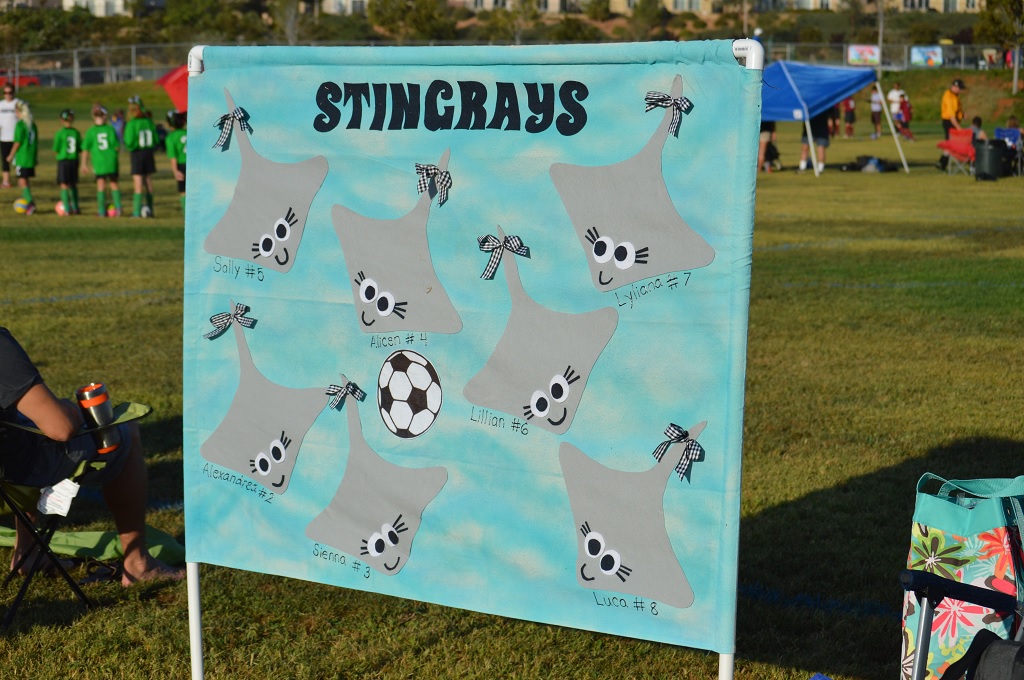
Team Logo and Mascot: If your team has a logo or mascot, incorporate it into the banner design prominently.
Slogan or Motto: Consider adding a team slogan or motto that represents your team’s values and aspirations.
Player Names and Numbers: Optionally, you can include the names and numbers of team members, adding a personal touch.
Images and Graphics: Use images of soccer balls, players in action, or any other soccer-related graphics to enhance the banner’s theme.
Step 2: Gather the Materials
To bring your soccer banner designs to life, you’ll need a few essential materials:
Fabric: Choose a durable and weather-resistant fabric like vinyl or polyester. You can find these materials at local craft stores or online.
Paint and Brushes: Acrylic paints are ideal for fabric banners, as they are long-lasting and easy to work with. Purchase a variety of brushes for different paint strokes and details.
Markers and Stencils: Invest in high-quality markers for adding fine details to the banner. Stencils can help you achieve precise shapes and lettering.
Grommets and String: To hang your banner securely, you’ll need grommets (eyelets) and string or nylon rope.
Step 3: Measure and Cut the Fabric
Once you have your fabric, measure the desired size for your banner. Use a fabric marker to mark the dimensions and cut the fabric accordingly. Leave a little extra space around the edges for hemming and reinforcing.
Step 4: Design and Paint the Banner
With your fabric ready, transfer the planned design onto it using a pencil or fabric chalk. Start with the background color and work your way up to the smaller details. Use different brushes to create texture and add depth to your design. For lettering, you can use stencils or freehand, depending on your artistic skills.
Step 5: Hem the Edges
To prevent fraying and give your banner a polished look, hem the edges. Fold the edges of the fabric over, and either use fabric glue or sew along the edges. This step ensures your banner will last longer and withstand outdoor conditions.
Step 6: Add Grommets
Attach grommets to the corners and along the top edge of the banner. Grommets will allow you to string the banner and securely hang it at games or events.
Step 7: Display with Pride
Now that your custom soccer banner is complete, it’s time to display it with pride! Hang it at games, tournaments, or school events to show off your team’s spirit and support.
Conclusion
Custom soccer banners provide a fantastic opportunity to showcase your team’s identity, passion, and creativity. By planning your design carefully, gathering the necessary materials, and following a step-by-step process, you can create a stunning banner that will make your team stand out on the field and inspire supporters off the pitch. So, let your team’s spirit soar high with a personalized soccer banner that celebrates the love for the beautiful game!